Northern lights photography is not as simple as you may think, simply pointing your camera at the sky on auto is not going to cut it. Although some phones are getting better at night exposure photography, your best method for taking good pictures of the northern lights involves a Digital single-lens reflex (DSLR) or one of the newer mirrorless system cameras. We’ll go through these different options together, but it is important to remember that at the bare minimum, your camera of choice should have the manual setting options to give you the best chances. If you’re already well acquainted with photography, feel free to skip to the basic shooting settings section, otherwise read on.

Frequently asked questions about northern lights photography
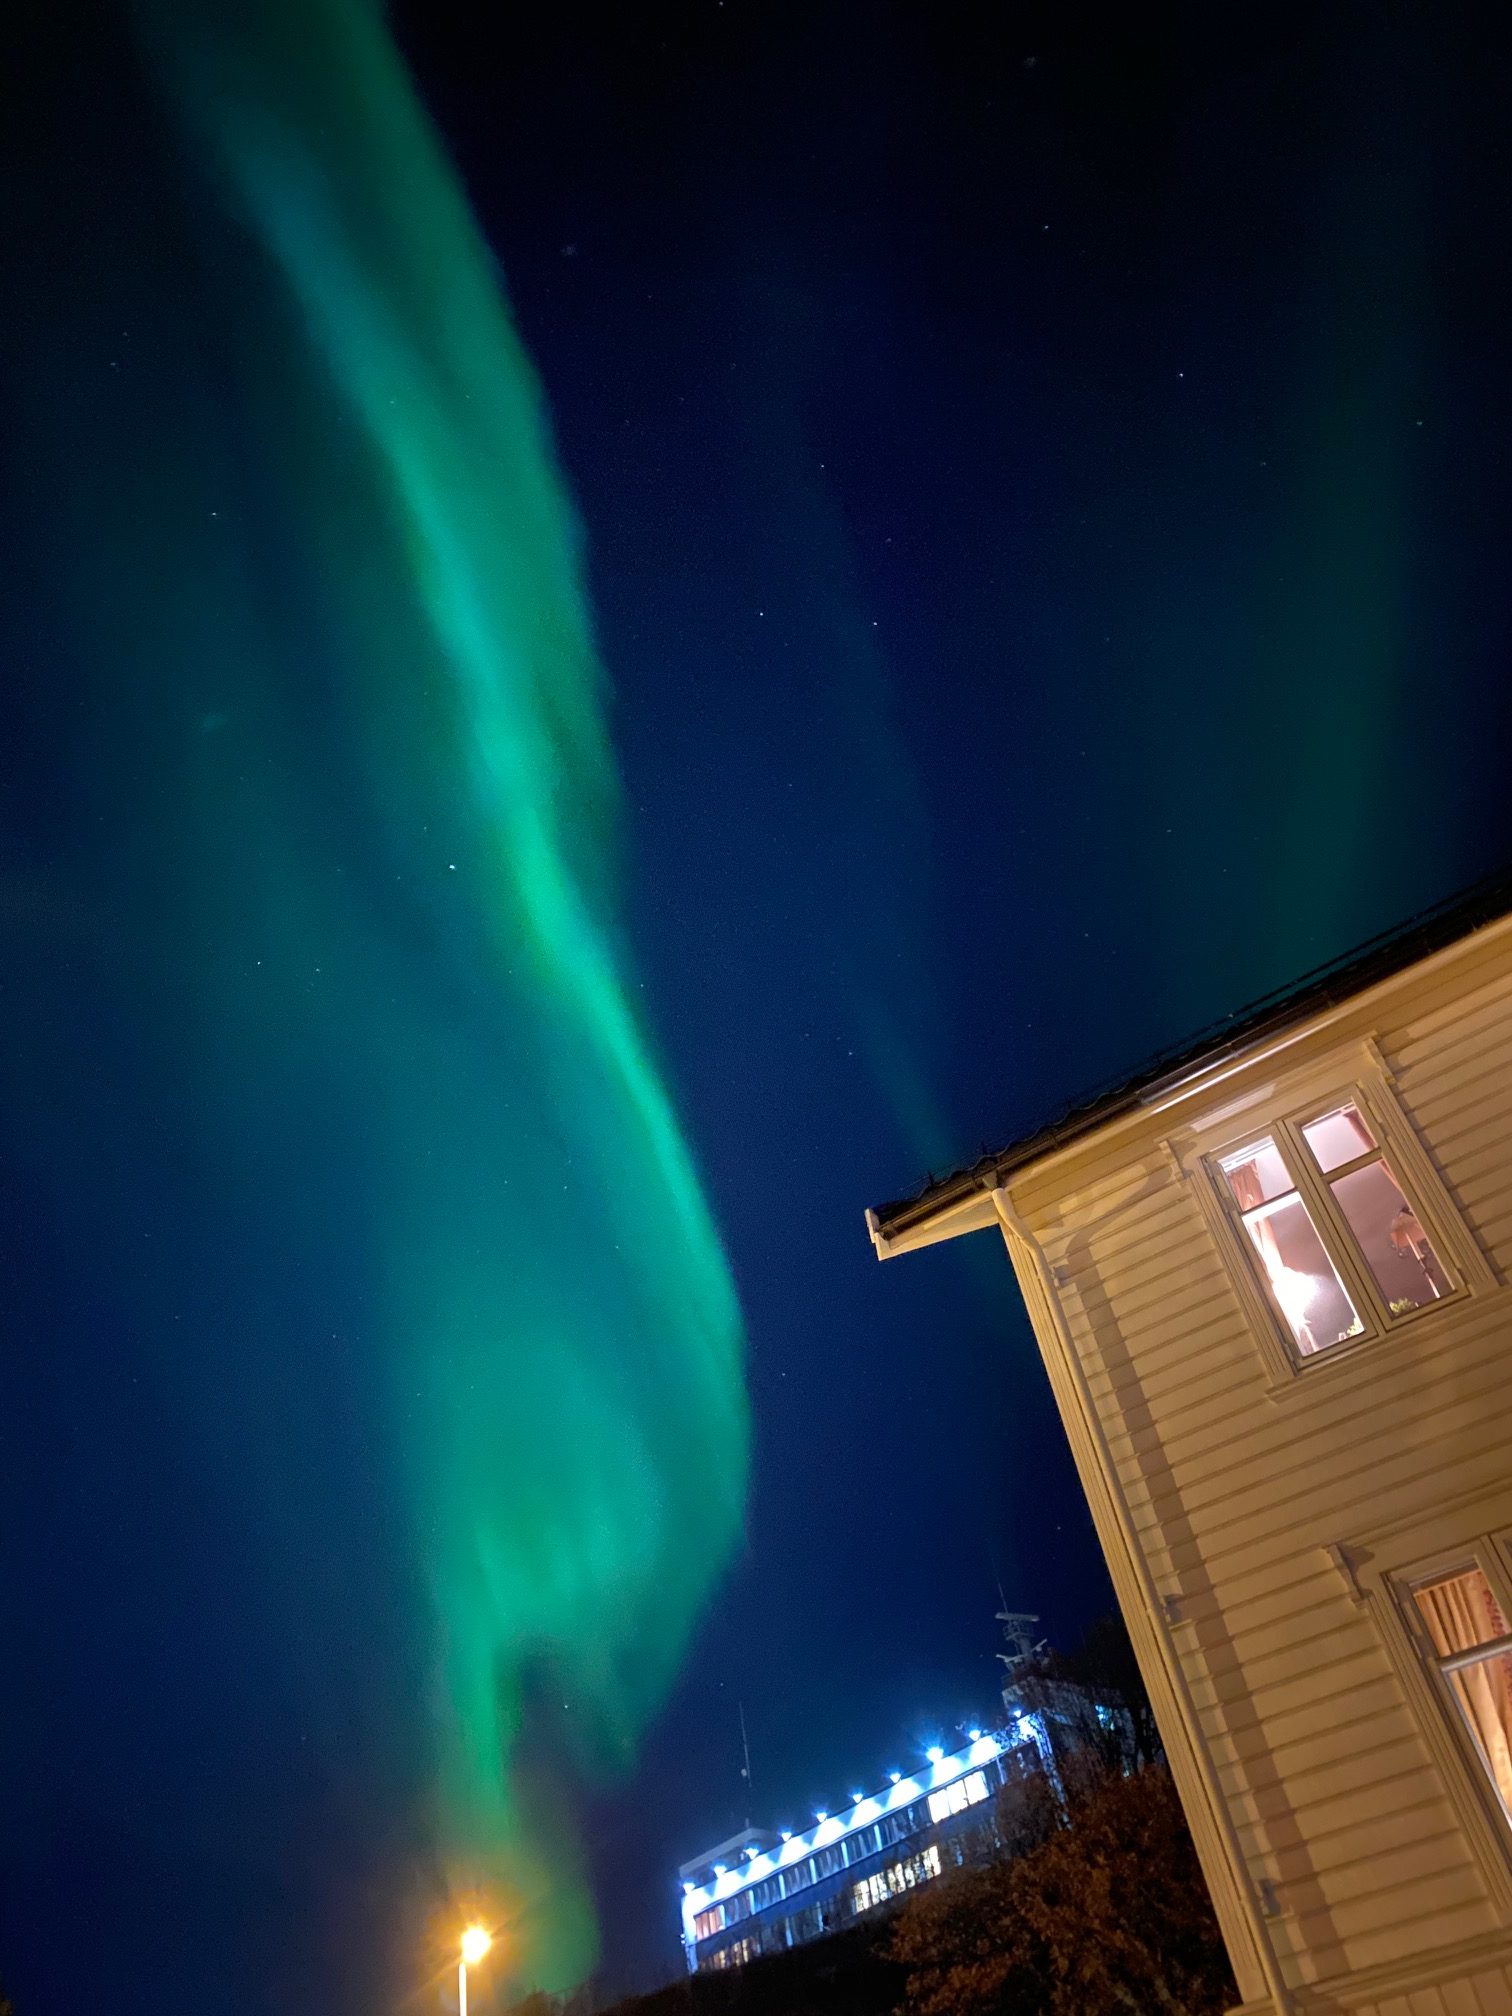
Yes and no. Nearly every professional photographer will edit their northern lights photos to some degree. This is because getting the perfect lighting on a photo in the dark is very difficult. Recently on various social medias, northern lights photos with ridiculous colours and unrealistic landscapes have started to pop up. So yes, some people do try to create something that isn’t real by using photoshop or other programmes. To some this is art, to others it is trickery, and it is up to you to make the distinction. Once you have tried yourself to take photos of the northern lights, you’ll get much better at seeing which images have been heavily edited, and those that are realistic.
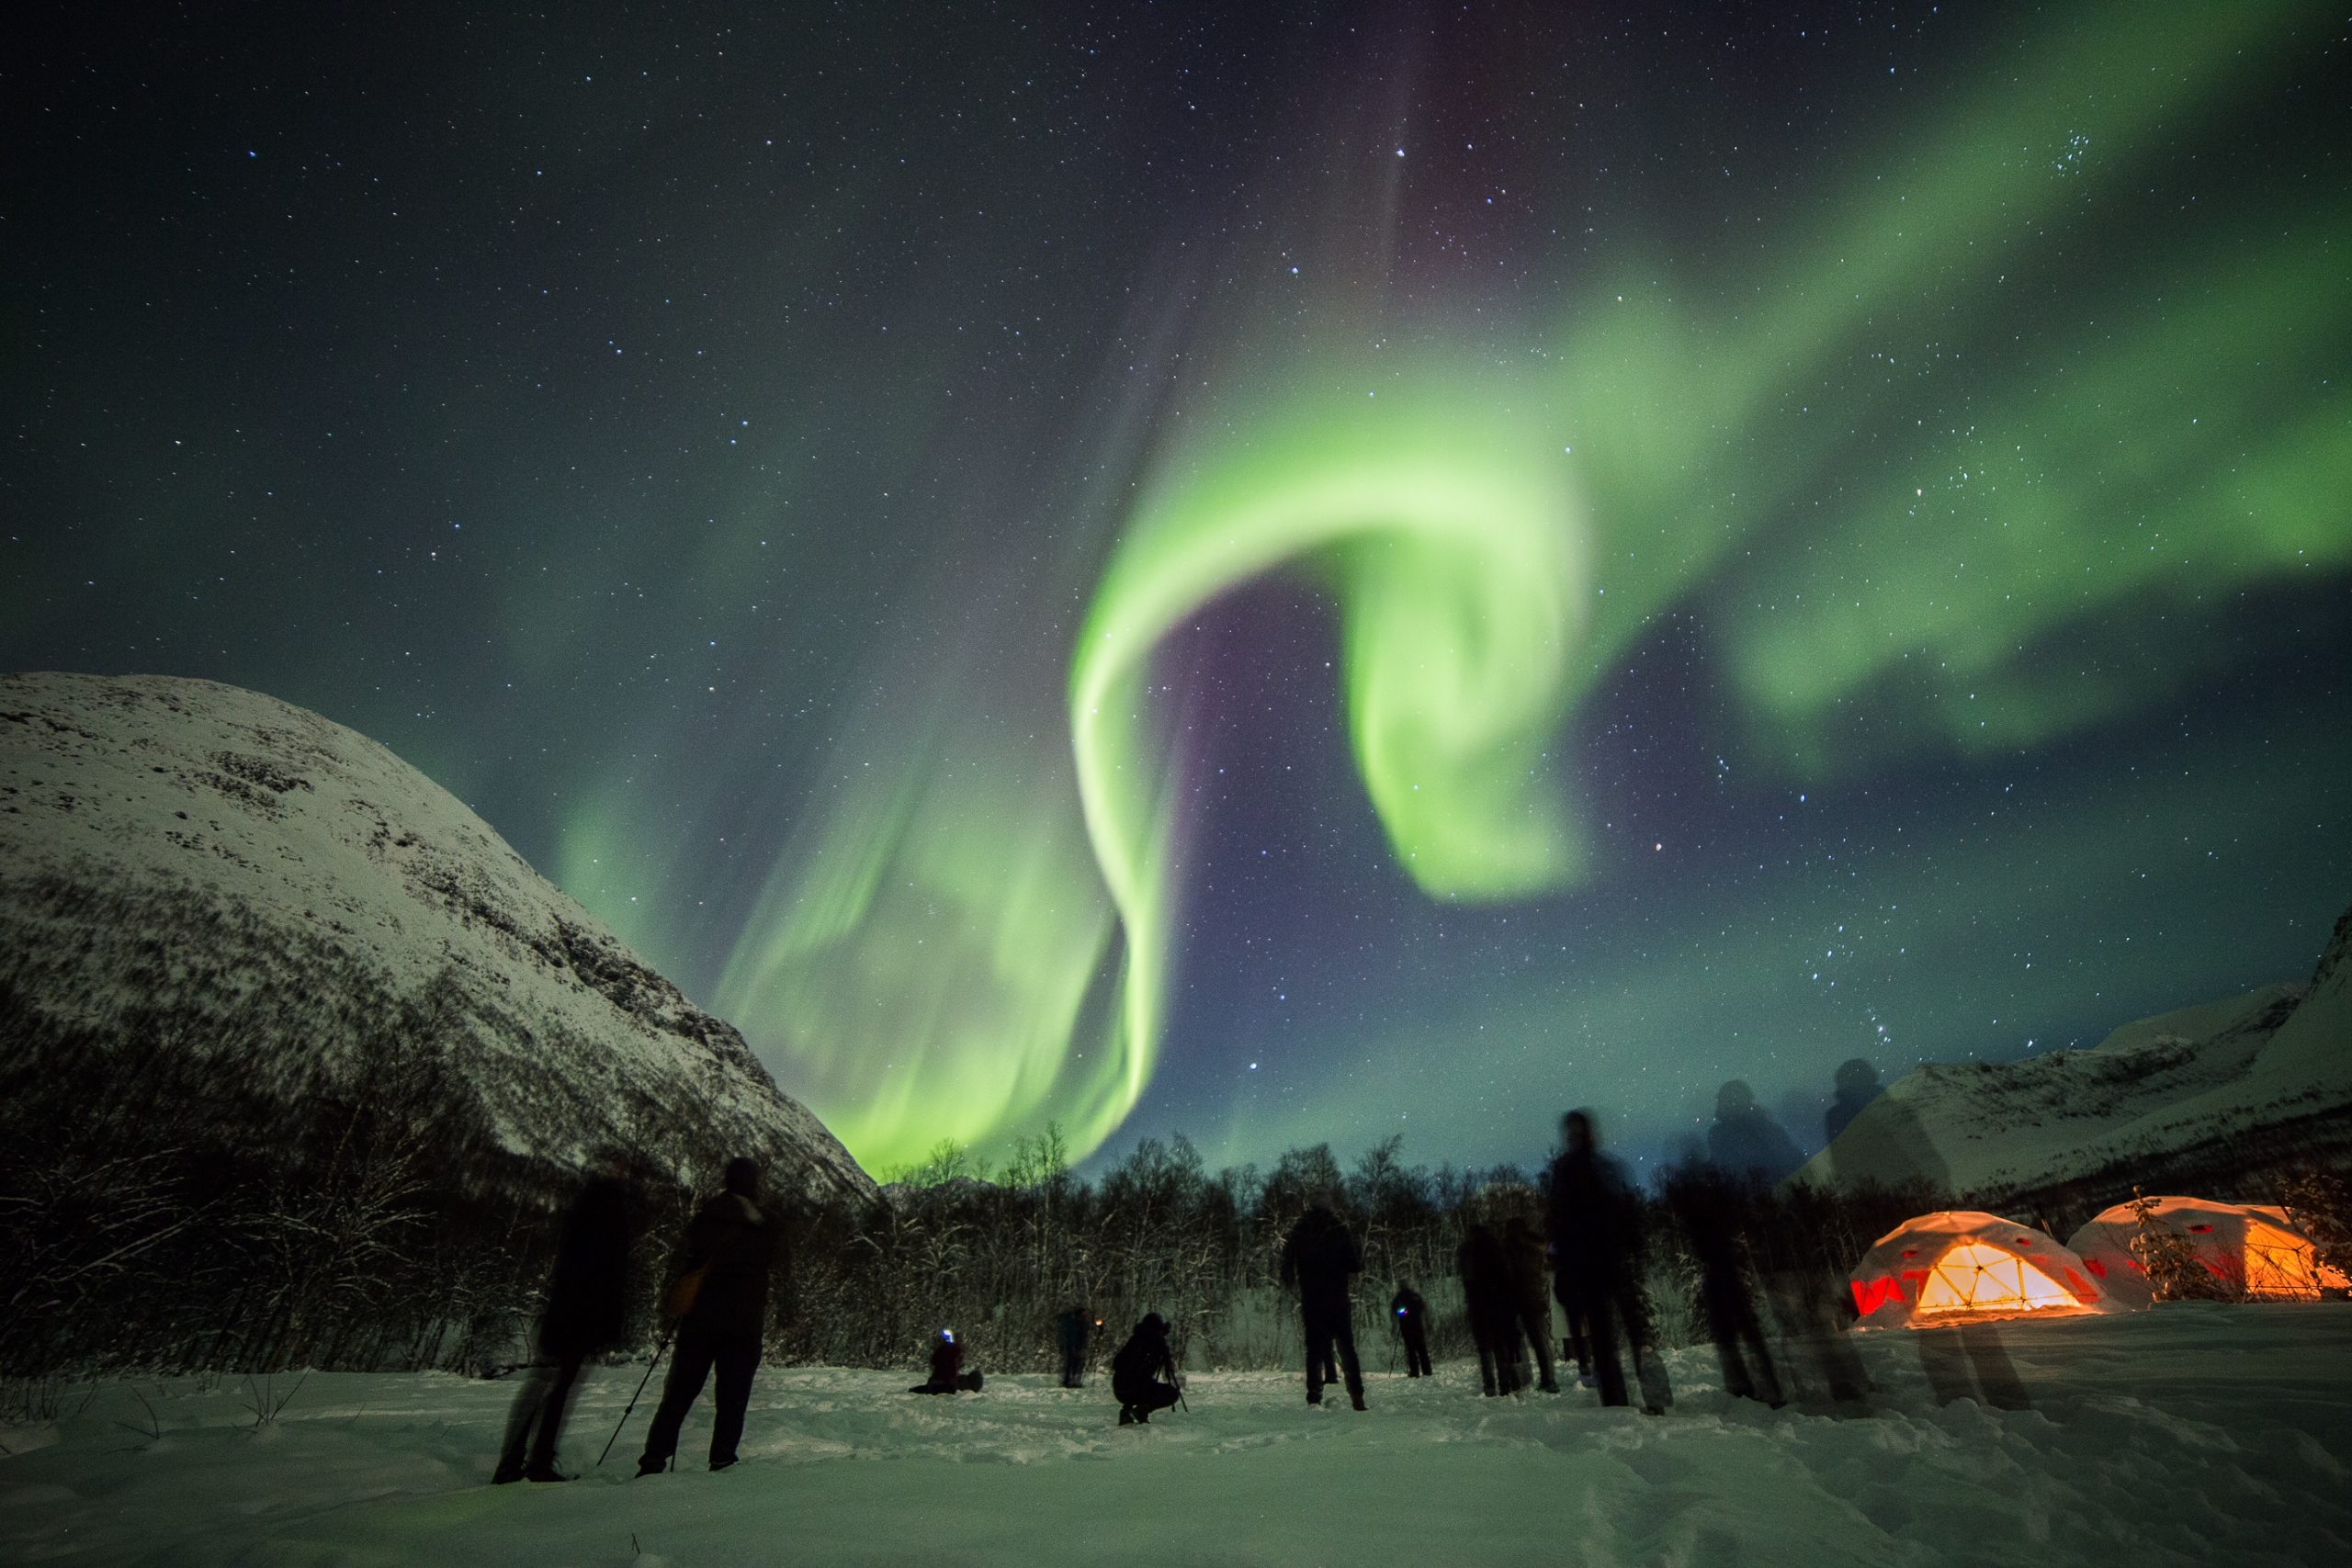
It is always important to be realistic about northern light photography and to keep expectations low. Many photographers on Instagram specialise in getting that ‘one picture’ and can spend days or even months waiting for the right moment. If you’re visiting only for a short time this isn’t very helpful. That is why I would always recommend getting in contact with locals and popular aurora photographers in the region who can give you great tips on the best places to go to get some great shots. Tours also offer the opportunity to be taken to places which are popular with aurora photographers, and you’ll get a helping hand with the camera too.
In most cases, sadly no. Compact cameras are small and therefore also have a small sensor for receiving light. Night photography is difficult for the camera and often images have a lot of ‘noise’ in them making them look blurry.
Only some of the newest phones will take exposure photos at night, and even then, you will never get a printable quality night photo with your phone camera. Although just for social media use, it can be a convenient way of getting proof that you can quickly send to your friends to make them jealous.
Equipment to think about before your trip
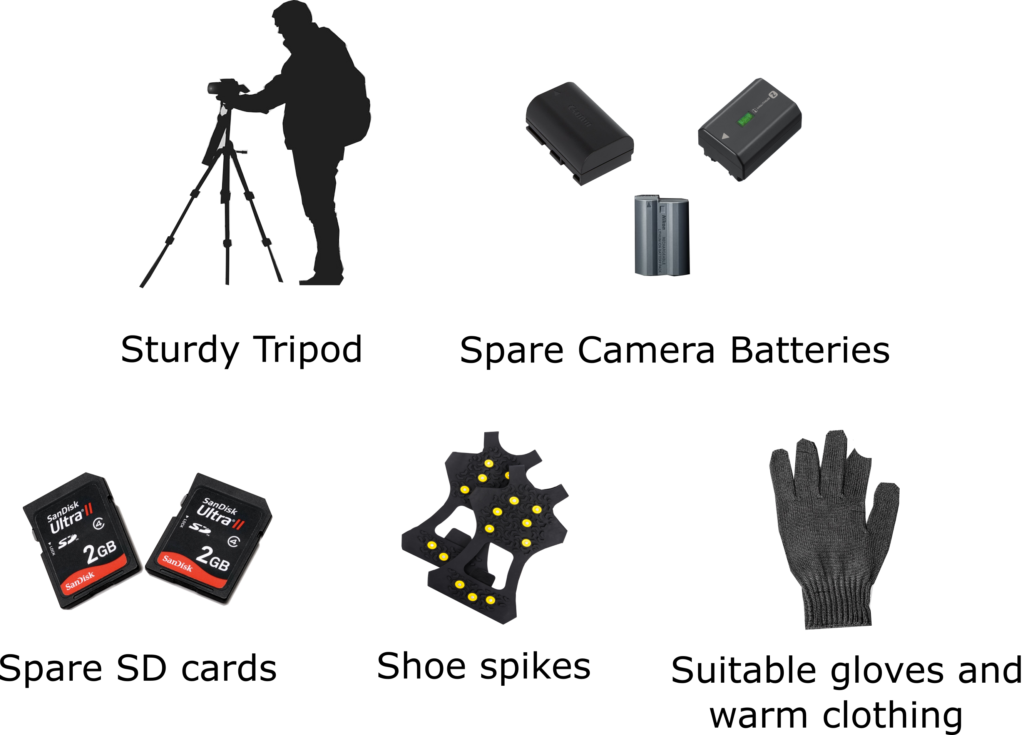
Before you even think about the camera and lens, equipment is a vital aspect of aurora photography.
- The first piece of vital equipment is a tripod. A strong and sturdy tripod will allow you to keep the camera still for the length of time needed to take an exposure, even in windy weather conditions.
- A spare SD card can come in handy, as exposure photography produces large file sizes, especially if you are shooting in raw format (which I highly recommend), wanting to produce a timelapse or even taking video.
- Second batteries are an advantage, as some camera batteries can run dry quickly in cold weather conditions.
- Photography friendly gloves. There is nothing worse than trying to use a camera with thick chunky gloves on. You’ll end up constantly removing them and get frustrated by the lack of mobility you’ll have when working your camera.
- Warm clothing and spikes. The lights are usually not there all the time, and it may take many hours before they show in the sky. Therefore remember to pack all your layers of clothing. The ground can also be quite icy in northern Norway, especially after a period of warm temperatures, so take your spikes just in case.
- A headlight is needed if you plan on going to areas that are very dark and there is no lighting whatsoever. However, it can be a nuisance if you or someone else nearby is trying to take a photo and the headlight causes their images to be ruined.
You don’t always need a fancy camera, but it does help
Full frame DSLR and newer full frame mirrorless cameras are currently the best for northern lights photography, however, not everyone has a fancy camera. Many new compact cameras have a manual mode where you can choose exposure settings or starry sky settings with the option of 5 to 15 or 30 seconds. Just know that the images will not be as clean as you may want due to high levels of ‘noise’. This is created because compact cameras, as their name suggests, are small, and therefore the sensor that receives light is also small. The less light that can reach the sensor, the more noise introduced into the image during night photography.
Mobile phones are getting better at night photography
Some new mobile phones have manual settings too, and aren’t that bad at taking aurora photos for use on social media. Simply go onto your phone camera, press the settings icon and see what your phone has to offer. If you have a manual settings option, you may be in luck. However, remember that photos taken with a phone will not be of the resolution that you can print out and have on the wall.
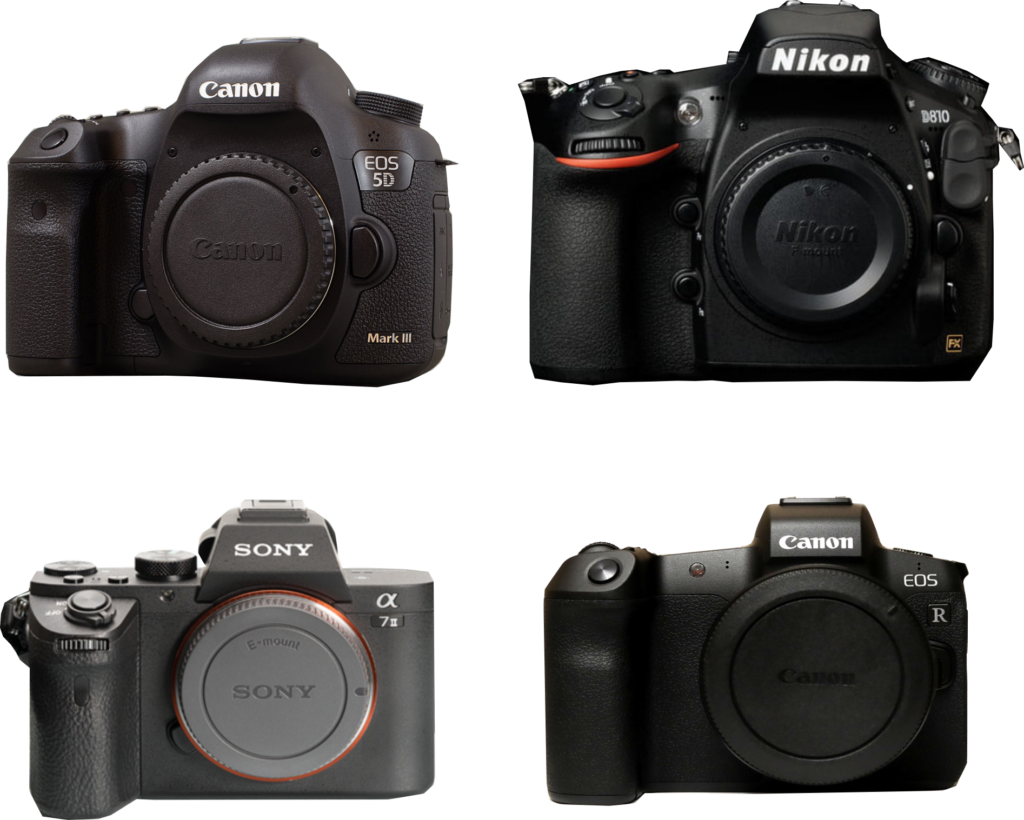
Full frame DSLR and newer mirrorless cameras are best
Now we come to the giants of aurora photography, the legendary DSLR and the growing in popularity mirrorless systems. DSLR’s work by means of a reflex mirror inside of them which reflects light into the optical viewfinder and to the sensor. The DSLR has been around for decades and can be found with a cropped or full frame sensor. Put simply, full frame sensors offer a larger surface area for light to be received, meaning better performance in low light conditions. Does this mean that if you have a cropped sensor it won’t work in the dark? No not at all. You can still get fantastic shots with a crop sensor camera, your lens choice is critical here.
Mirrorless systems don’t have a mirror, instead, the light goes straight through to the sensor and is not reflected. The image is represented on an LCD monitor or through the electronic viewfinder. Unlike DSLRs, the mirrorless camera monitor will show you what the photo will look like before you take it. This is seen as a huge advantage for some northern light photographers, who in the past were used to having to wait to see the image after it had been taken.
Both DSLR and mirrorless cameras get the job done well, it is up to your personal preference and budget as to which camera you wish to invest in.
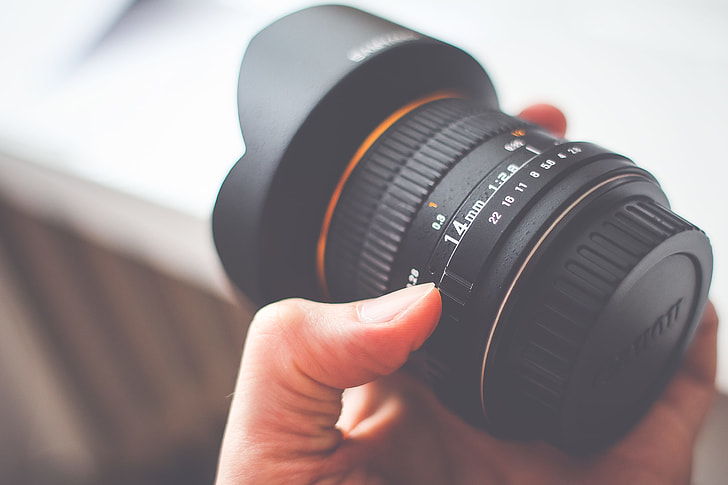
Your lens is your best friend
Your lens is your best friend when it comes to photographing the northern lights. The lights cover much of the sky, therefore it is important to have a wide lens. Between 14mm-25mm is the best range if you wish to capture a large portion of the night sky. You also want a fast lens, one that lets as much light into the camera’s sensor as possible. Most night sky photographers use lenses with an aperture (F-stop) between F1.4 and F4.0, depending on light conditions.
The five stages of taking a northern lights photo
Shooting in the night requires practice, and being familiar with your camera buttons and lens while in the dark is of great advantage. Knowing how to work the tripod is also a really useful tool as you may need to manoeuvre the camera quickly. Here we will go through together the steps to taking an aurora photograph, one step at a time.
Stage 1 is to make your camera work in the dark
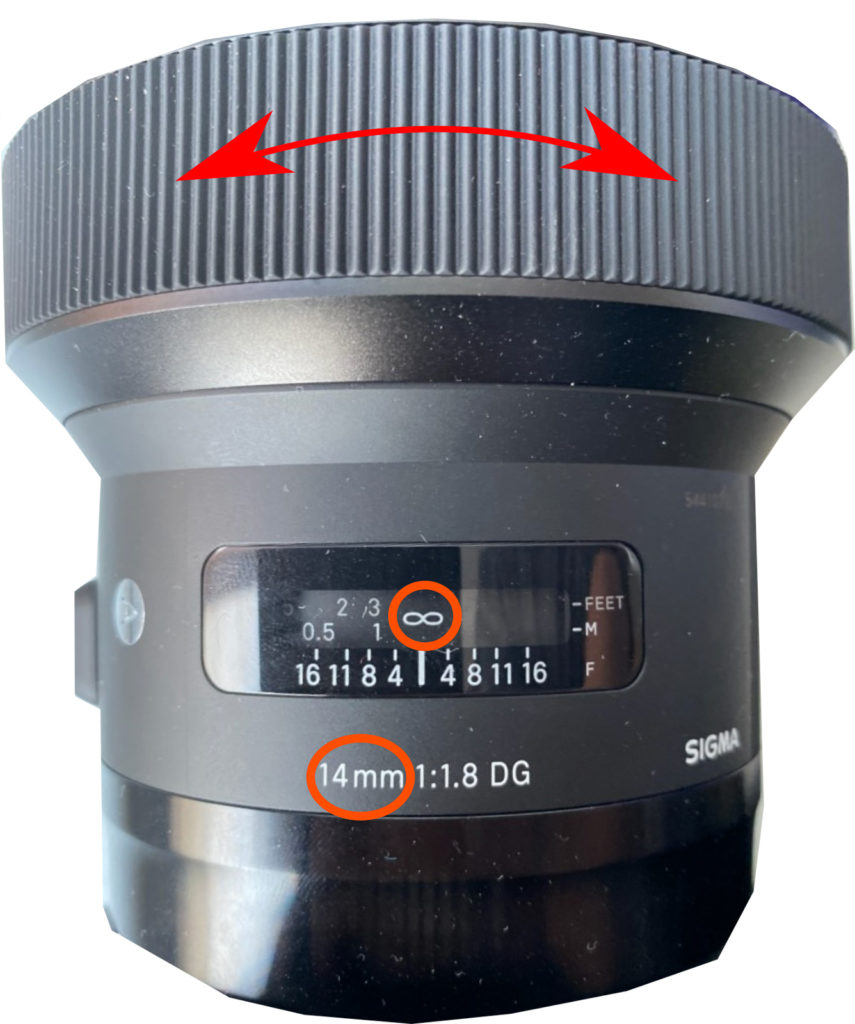
Turn the camera to manual focus – Often this is done by turning the dial on the top of the camera to M. Many lenses also have a switch on the side which will need to be turned to manual from auto. It is also a good idea to turn off image stabilisation, as you will have the camera mounted on a tripod so it is not needed and can actually causes a small amount of movement as the photo is taken.

Stage 2 gets you in focus
Find infinity focus (∞) – Most lenses will have a line or symbol on the lens which indicates infinity focus. However, when temperatures are cold, this can shift slightly. Therefore, turn your camera to live view (backscreen view), find a star or light in the distance, and turn the focus ring until the objects are in focus.
Stage 3 is to assess light levels for your settings
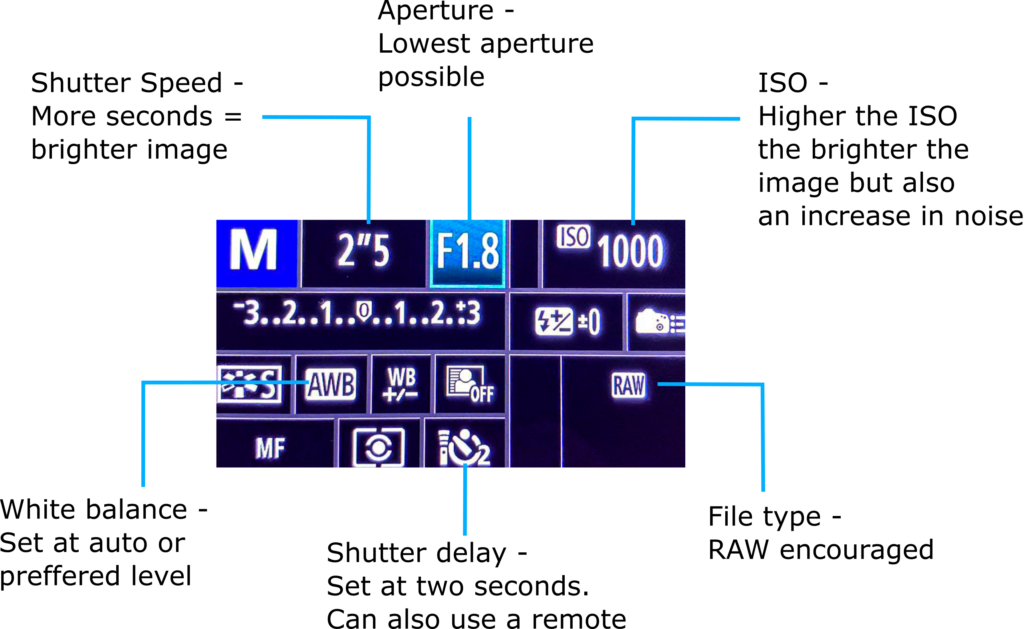
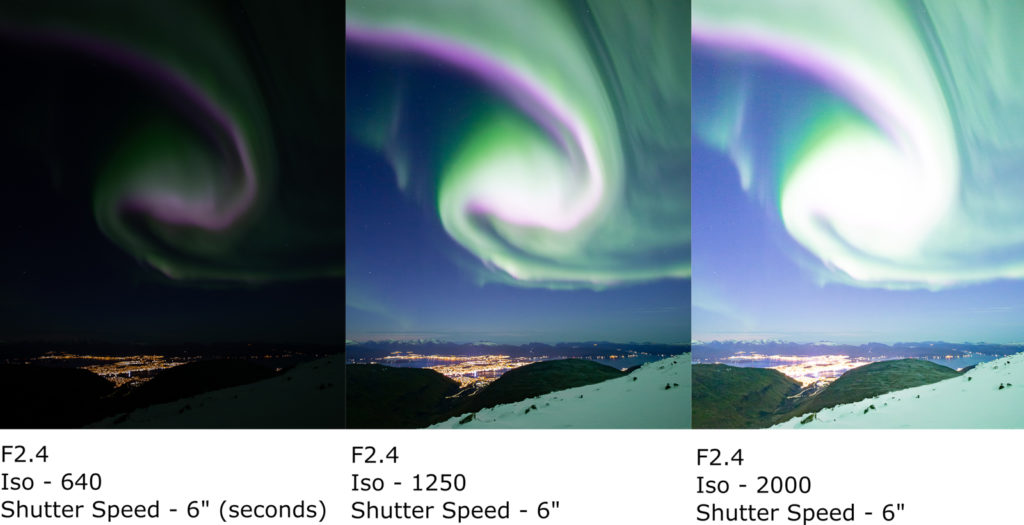
Asses the light conditions and choose your ISO level and aperture – Your ISO is your camera sensor’s sensitivity to light. The darker the surroundings, the higher your ISO needs to be. An ISO of 1600 is a good starting point, with an aperture of between 1.4 and 4, depending on your lens’s capabilities. Full moon conditions usually require an ISO of 800 to 1200, while new moon conditions require an ISO of 1600 plus. Remember however, the higher you go with the ISO, the more noise you are likely to get in your images (not a huge problem with newer mirrorless systems).
Stage 4 is shutter speed and perhaps white balance
Choose your shutter speed – The darker the scene, the longer your exposure time needs to be. As an example, start with 1600iso then turn the dial to between 5-10 seconds. Some may also wish to set their white balance here, as in some light conditions the lights can appear too ‘warm’ or too ‘cold’, however this can be corrected in post editing so is not a huge issue.
Stage 5 is to take the photo and assess
Take the photo – Too light? Reduce your ISO and or exposure time. Too dark? Increase your ISO and or exposure time. You will need to play around with these settings to get the best lighting, which is why it is a good idea to practice before going out on an aurora hunt.
Taking portraits takes small adjustments
To shoot a portrait of someone under the lights, follow all the rules above. However, instead of focussing on infinity, you need to focus on the person. This can be done by shining a headlight at the person as you find focus. While taking the exposure, shine a light at the person for less than a second, this lets them show up on the photo, instead of a dark silhouette. And make sure the person stays as absolutely still as possible for the while exposure time. Remember to find infinity focus afterwards!
A quick gif illustration of how to take a portrait of someone under the northern lights. Take each step at a time, and practice out in the open before doing the real thing © William Copeland
Shooting in the cold can lead to mishaps
Let’s face it. There are very few situations where we willingly stand outside in sub zero temperatures for hours on end. We are therefore not so used to dealing with our equipment in such conditions. Here is a list of three of the worst mistakes you can make while out on an aurora hunt with regards to your equipment.
- An unsuitable tripod – I am not just talking about weight or size here, although of course more sturdy the better. There are some brands out there that are metallic, with no foam handhold. This is no problem in average temperatures, but in the cold, your tripod can become dangerous. Metal in freezing temperatures can quickly become cold enough that skin can stick. Holding onto the tripod for even a short period of time can cause a nasty frostbite to develop if you’ve taken off your gloves to deal with the camera settings.
- Taking your camera into warm and moist conditions during the night – After having your camera out in the cold for a period of time, the camera body temperature can fall below zero. This is not dangerous for the camera. If you take that camera indoors to a warm location, whether that be a warm car, outhouse or even breathing too close to the lens, moisture will form. This moisture will instantly freeze on your camera and lens (worst case scenario). Clearing ice from your lens is a risky business, while in severe cases you can even develop ice within the camera house and lens, causing untold damage. Leave the camera on the tripod outside all evening, and if you need to move it inside, place it into a camera bag or other form of storage and leave it inside the bag until you need to use it again. This gives the camera time to adjust to the temperature change slowly.
- Getting too close to water – The amount of cameras that have been lost to the fjords, ocean and lakes of Northern Norway in pursuit of an aurora shot is infinite. Of course, reflection pictures are very popular, but it is not worth losing your camera. Often on the edges of fjords and even on the beaches facing the open ocean in winter, icy stretches can form, making it easy to fall. Play it safe and keep a reasonable distance from any large water source unless you are sure that the area is safe.
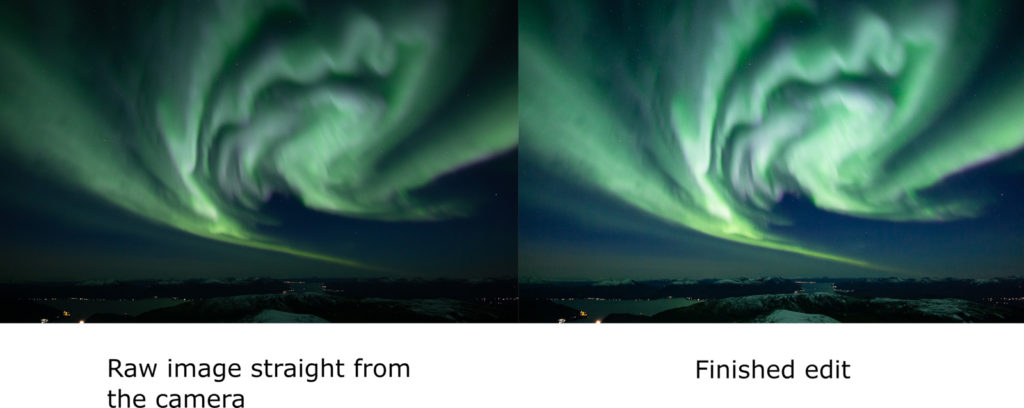
Editing is where the magic happens
When your SD card is bursting, it is time to transfer your photos to your computer for editing. There is no aurora photographer that does not edit their photos to some extent. Why? Because getting the perfect light settings of a scene in the night is almost impossible. Most photographers use lightroom, photoshop or other kinds of editing software. To go through a full editing process would require a whole new article, so we recommend checking out some great youtube videos and various webpages with information about editing northern lights photos.
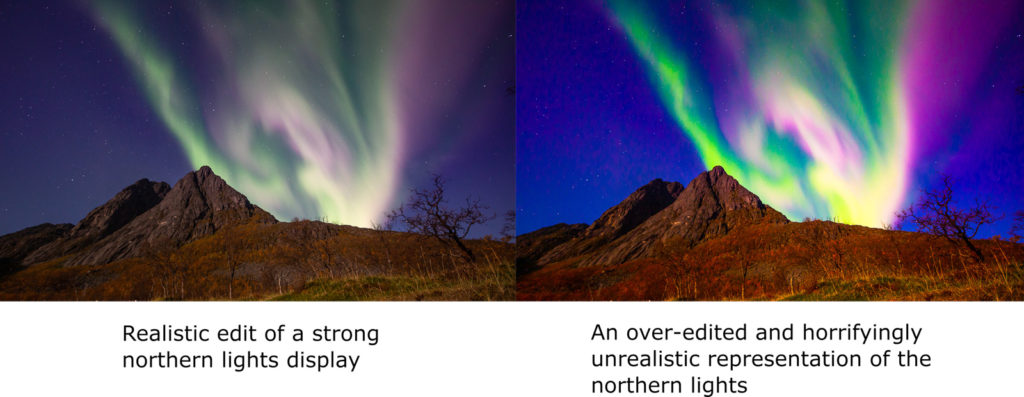
Don’t edit to the point of unrealism
Editing is not to make the image look unreal. Editing is to recreate the scene as it was to the observer. Far too many times these days we see photos of the northern lights that have been edited to such extreme extents, that they simply don’t look ‘natural’ anymore. Weird browns, oranges and turquoise blues, that simply don’t exist, seem now commonplace on social media. This poses a huge challenge to photographers and northern light tour guides that are trying their best to keep expectations realistic. Expectations are often built upon unrealistic social media aurora photos, and can cause huge disappointment for visitors who feel scammed by such photos. Just bear in mind that when you edit your photos and post them online, that you try and be as realistic as possible.
To sum up
Taking great northern lights photos takes practice. We recommend to try out all the settings and techniques mentioned here in this article in a dark setting before attempting to take photos of the northern lights in the field. You will then be fully prepared for when you are out there in the dark landscapes of Northern Norway!